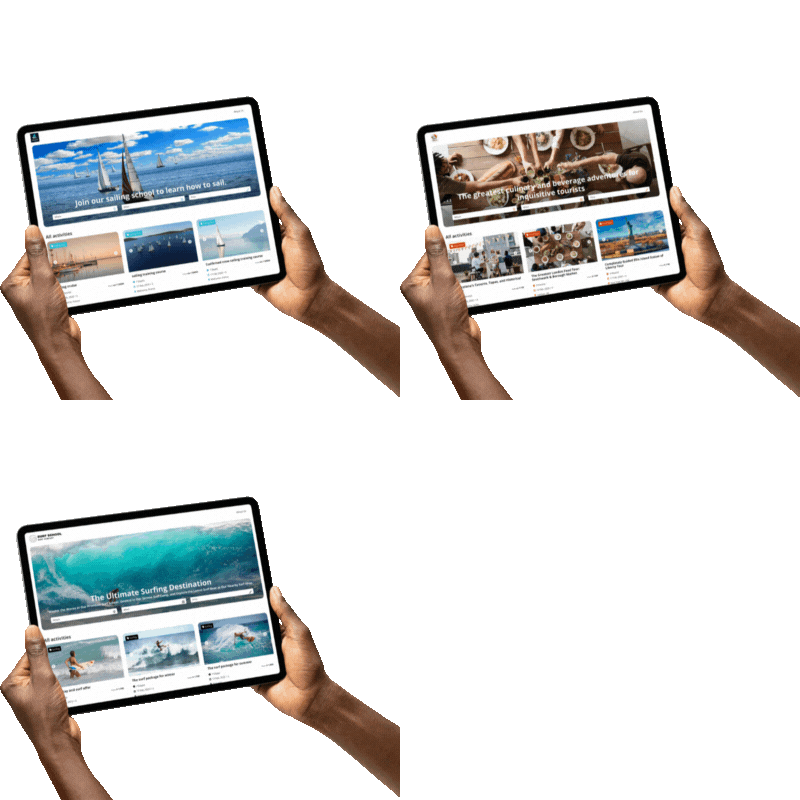
Introduction
Selling your travel package online has a lot of advantages. You can sell any of your tour experiences to many people worldwide. It doesn’t have geo-restrictions. If you plan to take your travel business online, this guide is for you.
This Guide Is Ideal For: All travel package providers, tour operators, adventure activity providers, tour experience sellers, and outdoor activity providers can leverage this guide to start selling your travel packages online.
Benefits of choosing this method:
Even though many other solutions are available in the market to sell your tour packages, this method allows you to
- Build your travel website
- List all your tour and travel packages – unlimited listing
- Inbuilt booking engine
- 0% commission fee on your travel package sale
- Sell internationally in 135+ currencies
- Include additional add-ons to your travel packages like coupon codes, discounts, group pricing, etc.,
- Generate an email list by using a free email subscription box and more
- Optimize your activity listing for SEO using the inbuilt SEO feature and more
How to Sell Your Tour Packages Online – Step By Step
The market is filled with more travel & tour agencies as the demand for travel has increased.
This is the right time if you have a plan to sell your tours and activities. There are multiple ways to sell your tour packages online; we chose this method because at an initial and growing stage, travel startups are looking for a budget-friendly solution to sell their travel packages online. Thus, Advensure comes into this.
Advensure is a tour operator software that helps tour operators and travel agencies to create their own websites and sell their travel packages online using a booking engine.
There are two ways you can sell your tour packages online
- Integrate booking engine to your website – Ideal for travel agencies with the website
- Create your website with a booking engine feature – Ideal for travel agencies which doesn’t have a website.
So, without any further ado, let’s jump into the step-by-step process of how to sell tour packages online.
Integrate the booking engine into your website
This method is ideal for tour operators with a website for their business but doesn’t have a feature to sell online. Features like payment method, online booking & cancellation, etc.,
So if you want to sell your tours through your website, follow these steps.
Step 1 – Signup & Login
Go to the Advensure home page and click the “get started” button.

Select your country to continue
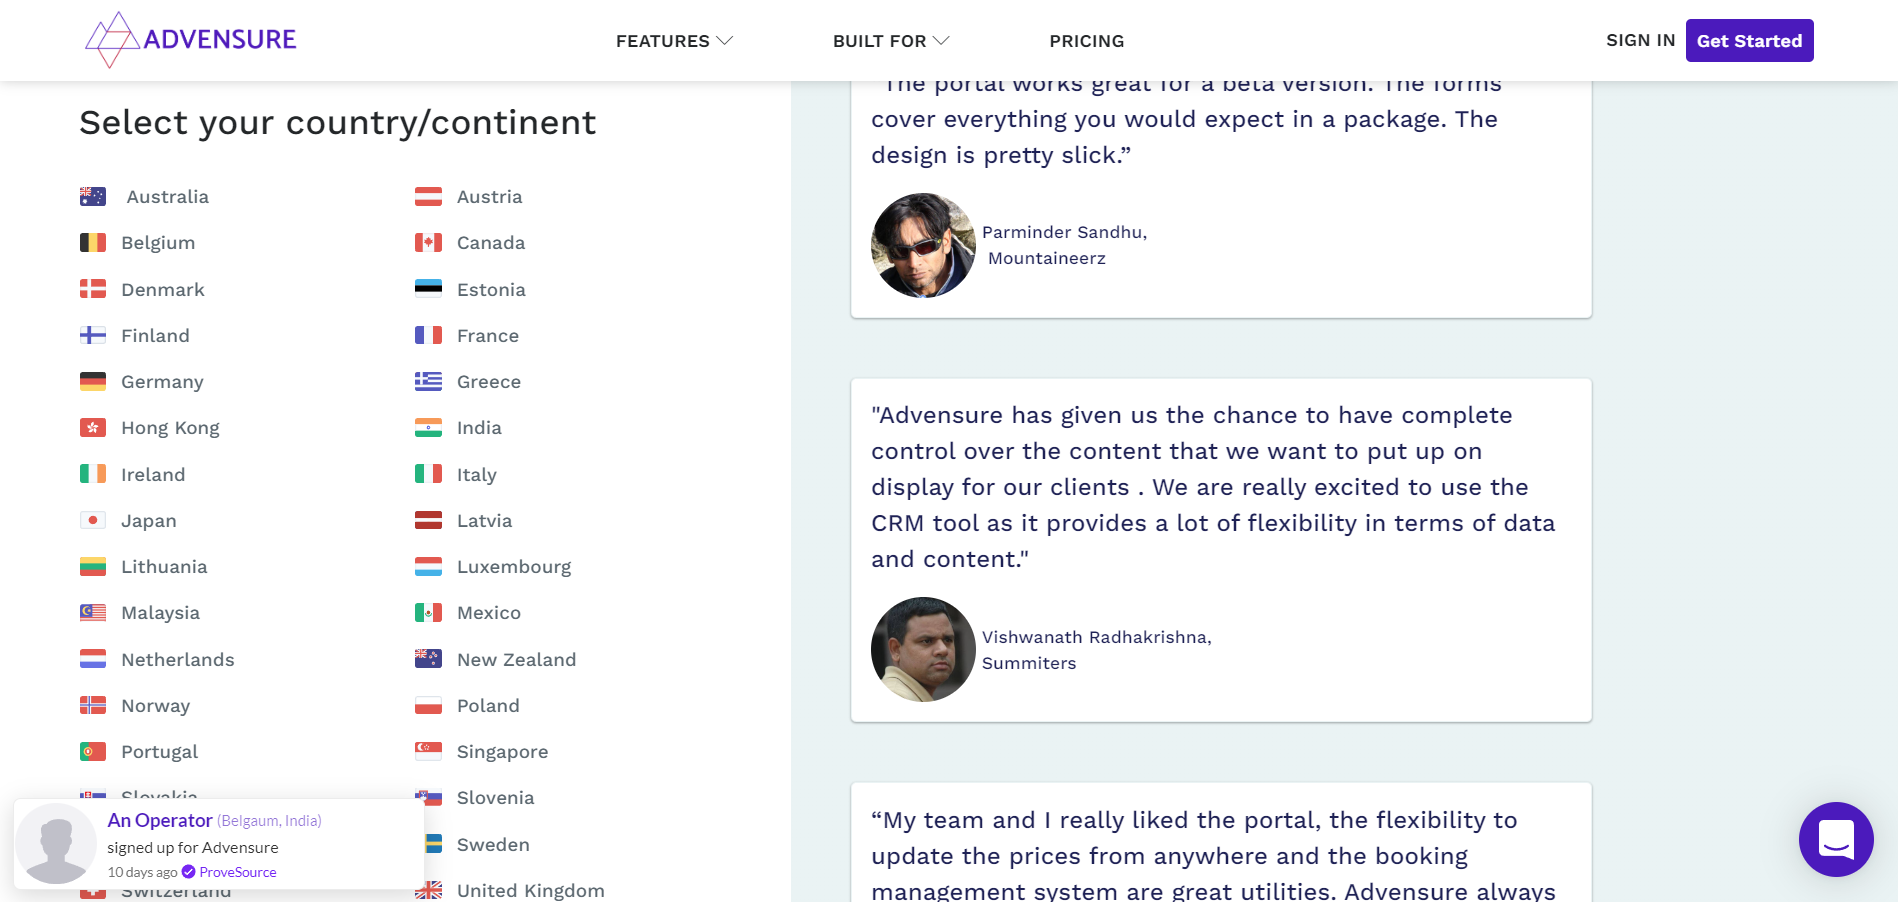
Enter your organization name and click next

Enter your email address, verify captcha and click next.

You will receive a verification code to your email address copy that code and paste it here and click verify code

You will be redirected to the next step, where you need to enter your details like your domain name, website language, email address & password, and then click the register button.

Hurray 🎉 your account has been successfully created now you can log in to your account.

Once you log in, your 30 days free trial starts, and you can use all premium features in this trial period. After 30 days, you need to upgrade to the plan.
Advensure plan starts from $15/month; you can change the currency as required. Advensure supports the following currencies.
- Australian Dollar
- Euro
- Canadian Dollar
- Danish Krone
- Hong Kong Dollar
- Japanese Yen
- New Zealand Dollar
- Norway Krone
- Singapore Dollar
- Swedish Krona
- Swiss Franc
- Pound
- Us Dollar
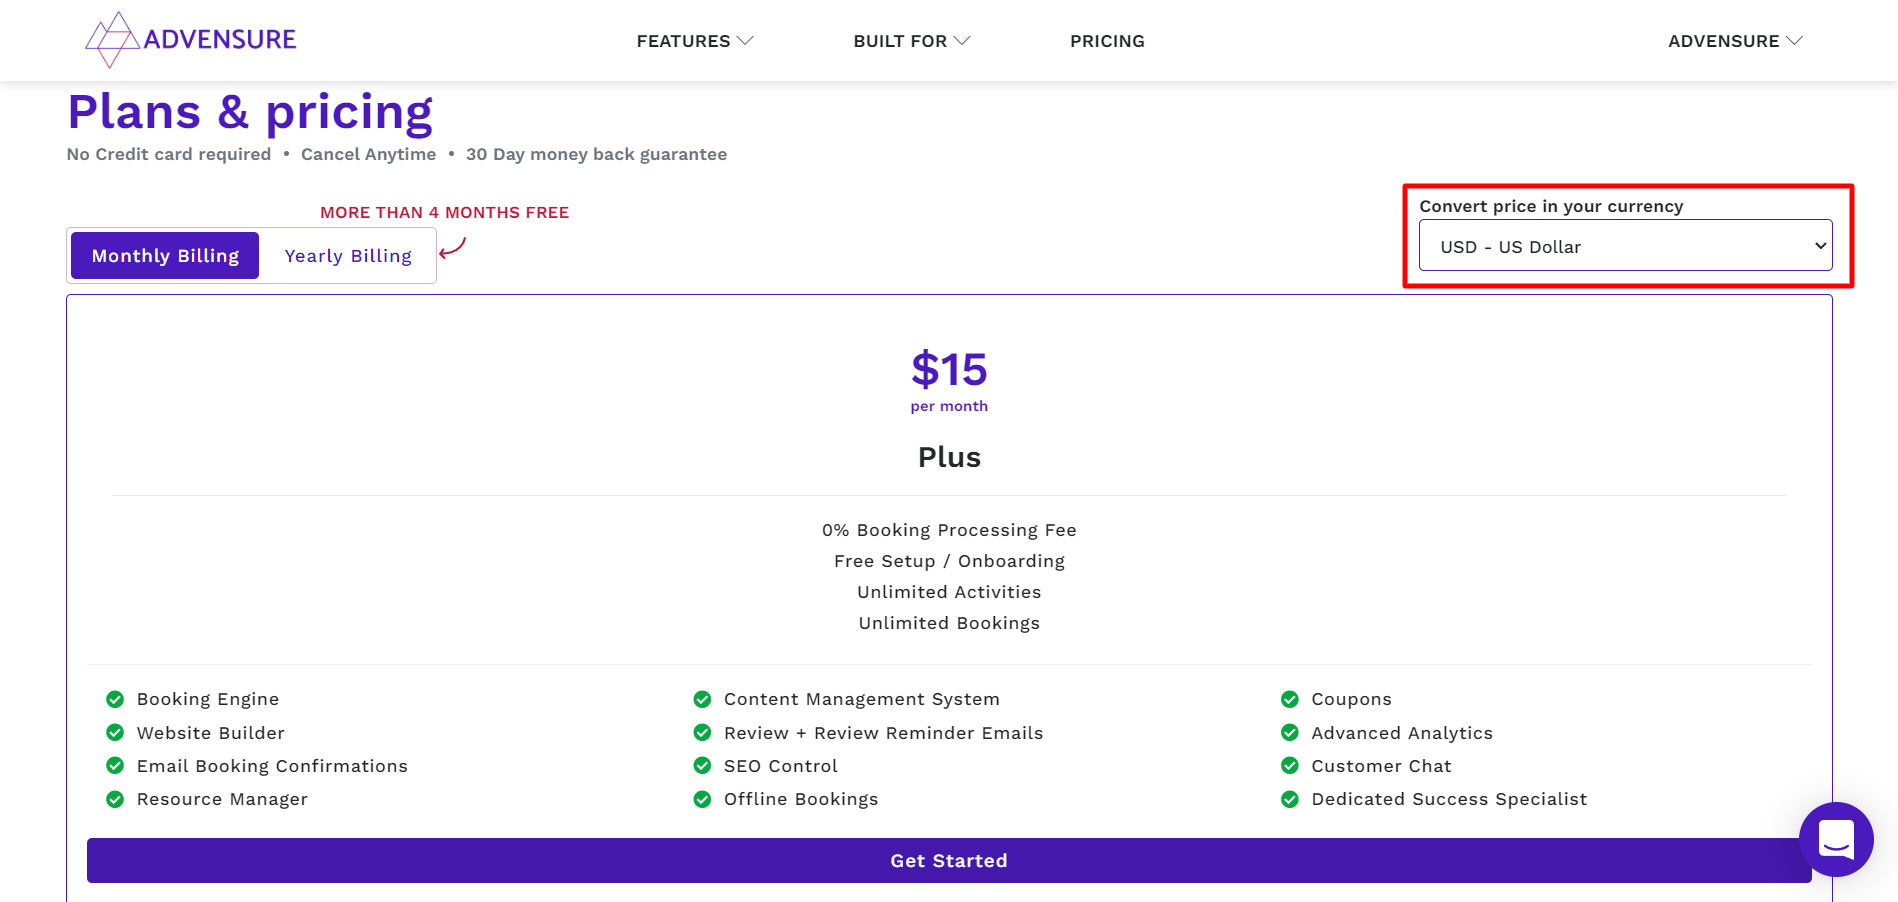
You can choose your plan ( Monthly/Yearly ) after 30 days of your free trial through your dashboard. For that, go to Dashboard -> Settings -> Subscription
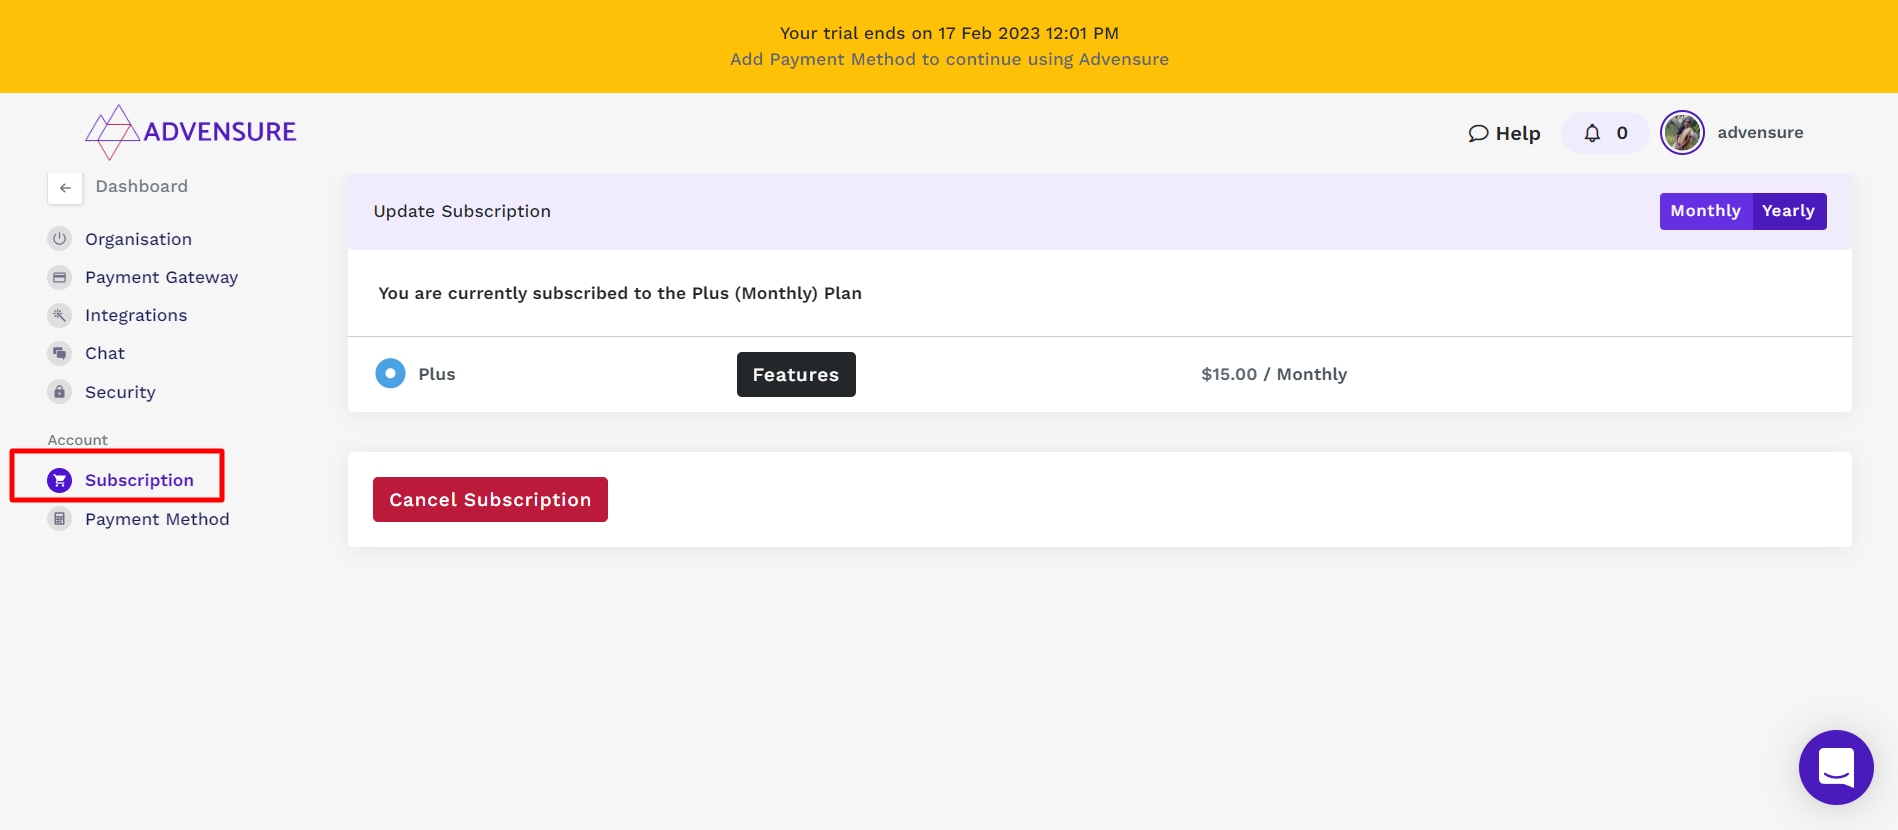
Since Advensure doesn’t ask for card details while signup, you have to update your card details on your dashboard to upgrade your account.
After selecting your plan, go to Payment method and enter your card details and coupon code if you have any to avail the offer. If not, skip that field empty and click update.
After 30 days of your free trial, your account will be upgraded.
Step 2 – Embed the Book Now Button To Your Website
📌How To Create A Tour Website In Simple Steps
You can sell your travel packages online even without a booking engine, but we will tell you that you missed out on some great opportunities to scale your online business.
Here are some benefits of having a booking engine on your website
- You can offer reservations for your customers
- Easier & Faster payments
- Save the time of replying to email/form queries
- Interaction with your customers
- Minimize workloads and more
Interesting right? Let’s embed the booking engine for your travel/tour website by following the below steps
1. Go to the dashboard -> settings page

2. In the settings page, go to Integrations -> book now integrations -> click view code.
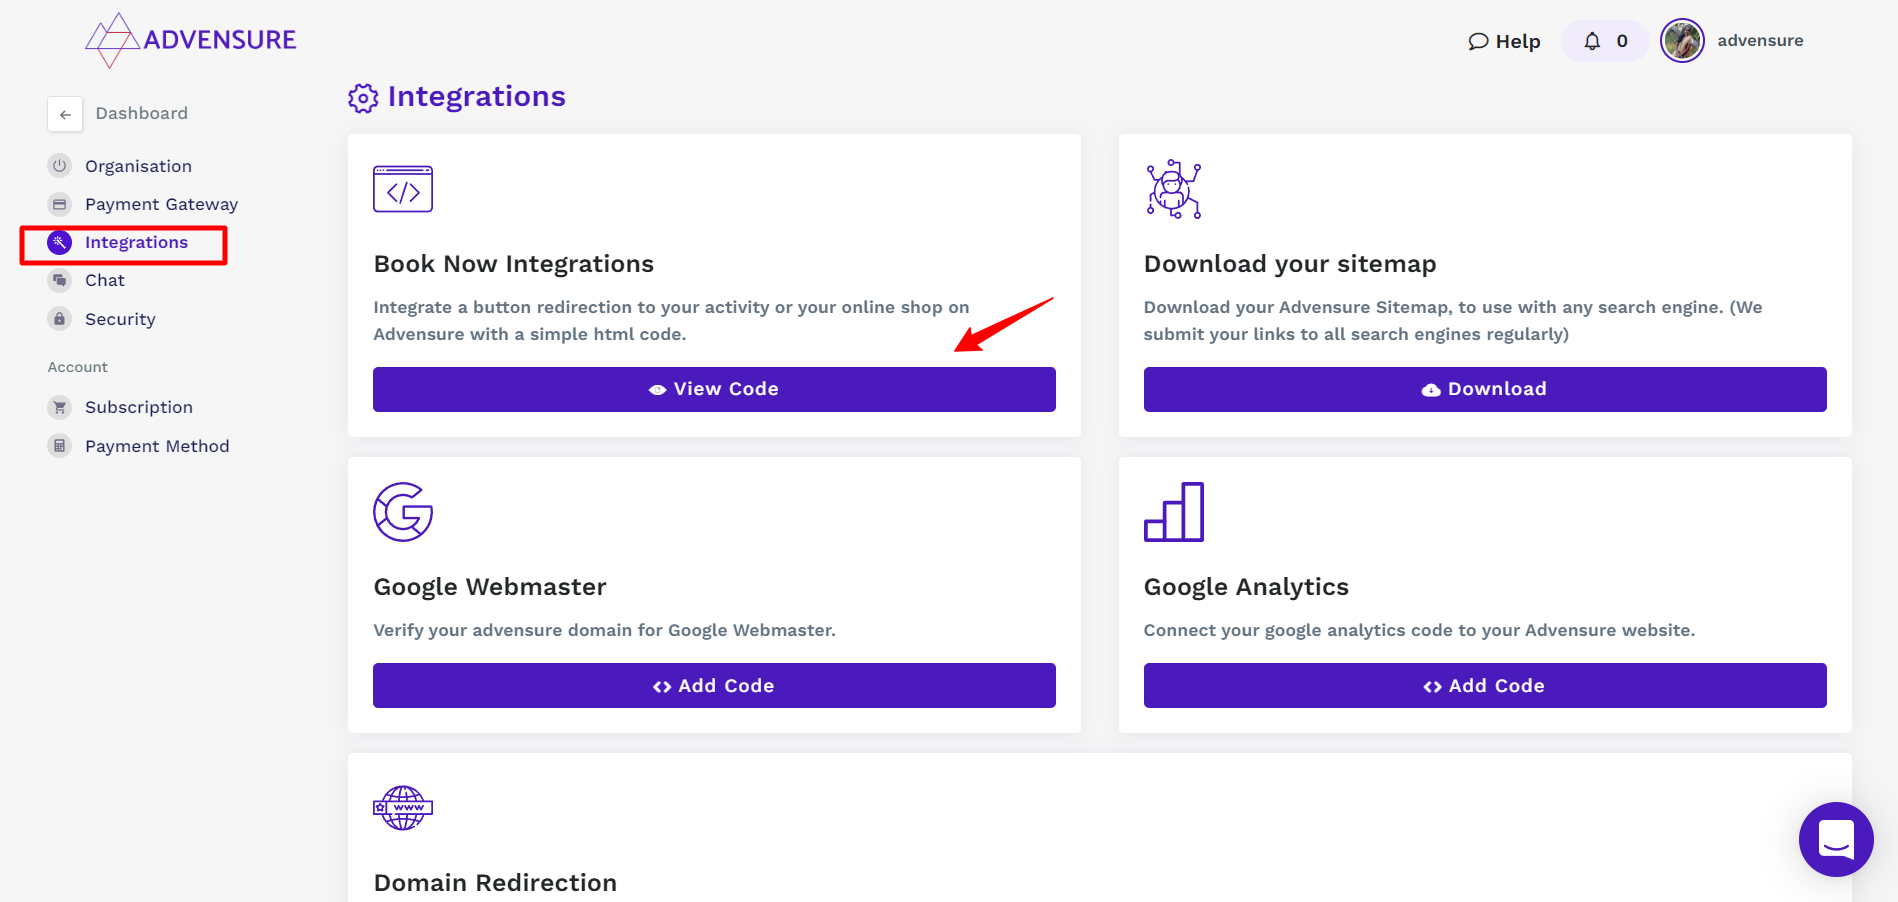
3. After clicking on the “view code” you will see the following screen, click “copy code” as shown in the image below
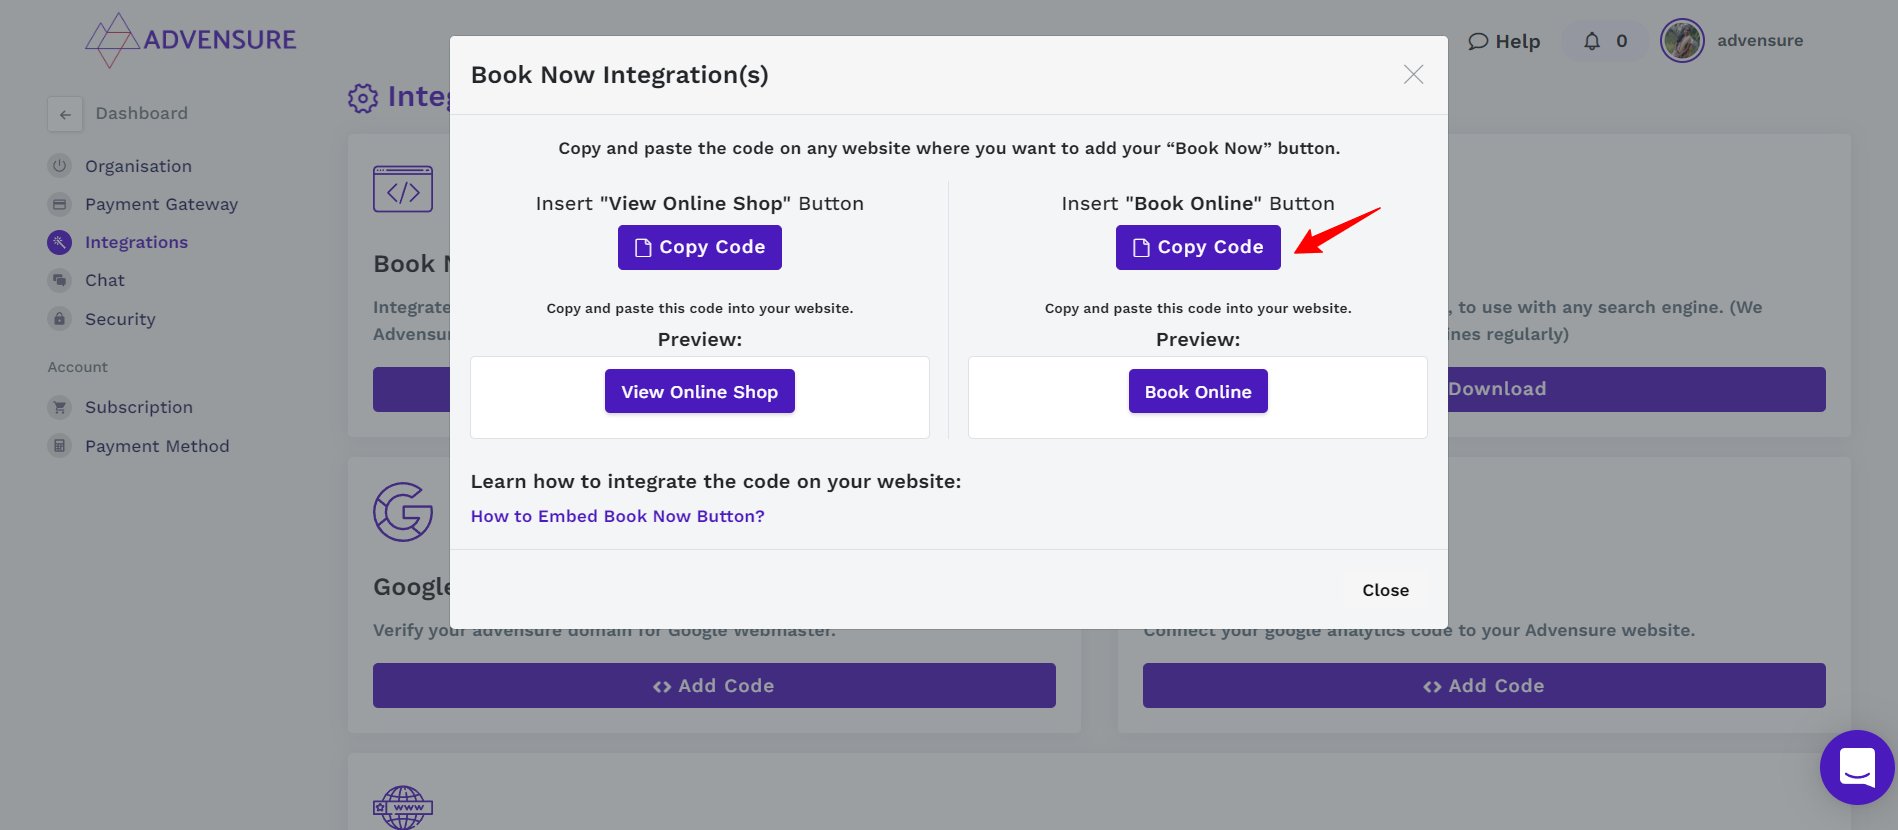
4. Once you copy the code, follow the steps mentioned in this document. This document will help you to set up this code on any of the platforms, whether you use WordPress website or Wix, or HTML.
Create Your Own Travel Website To Sell Your Tour Packages Online
This method is ideal for tour and travel agencies which doesn’t have a website to promote their travel packages online.
Step 1 – Signup & Login
Follow the similar instructions mentioned here.
Step 2 – Choose a domain name
There are 2 options available while choosing your domain; by default, Advensure creates the domain name (basically a subdomain of Advensure.io also known as Advensure managed domain) using the organization name you enter during the signup process.

If you don’t want the subdomain, you can connect your own domain with Advensure.
You can follow the instructions to connect your domain with Advensure.

Step 3 – Choose a Theme
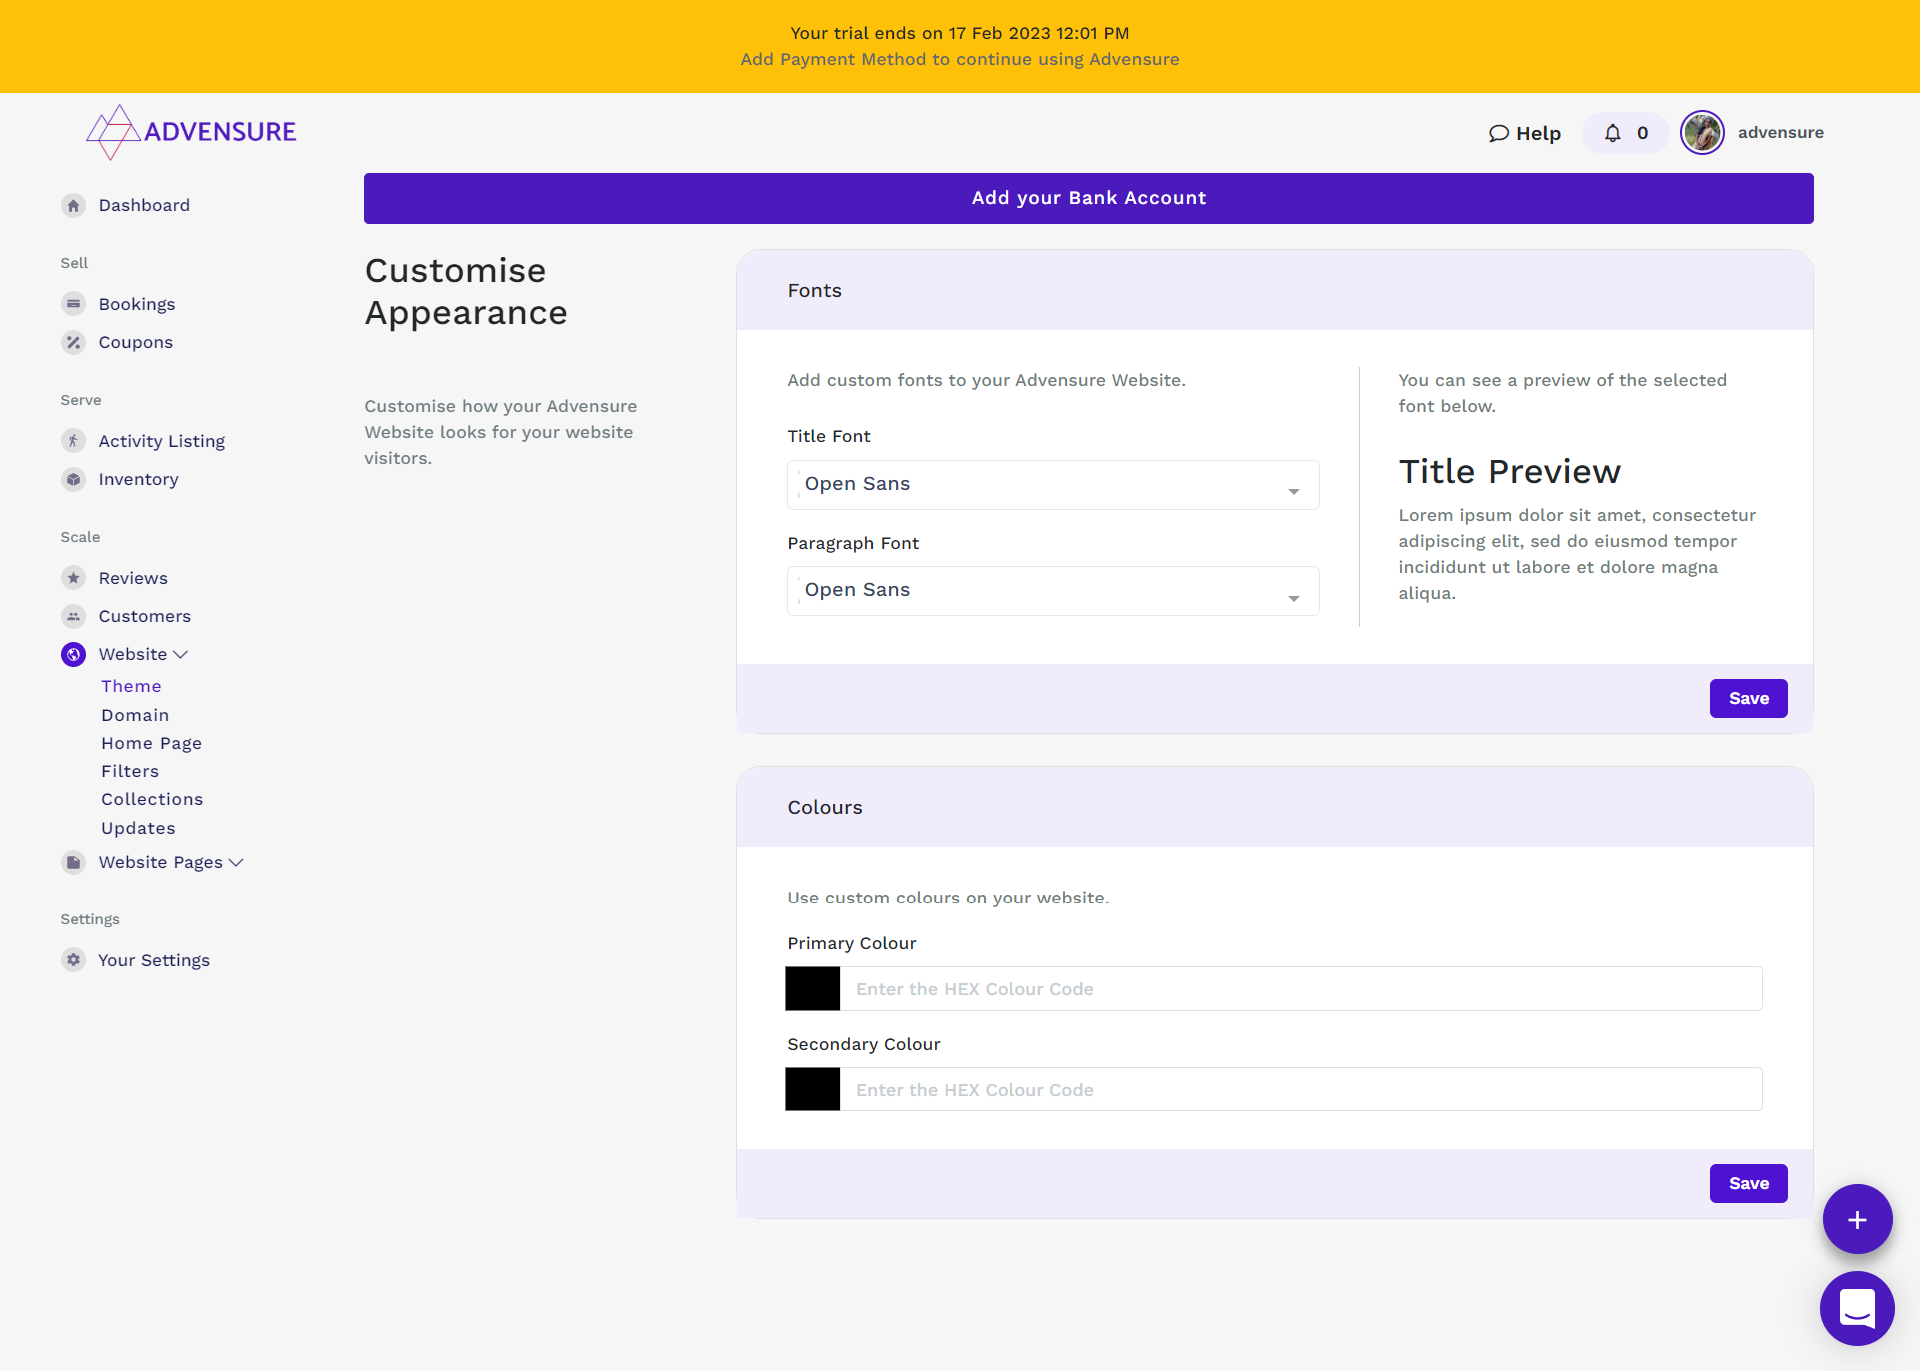
You can customize your website appearances like font and color. There are nearly 100+ fonts available to select from, and you can also preview that font on the side of the dashboard.
Step 4 – Customize your pages
You can customize your website pages by
- Adding filter option
- Adding your travel/tour/experience listing
- Adding a date to the listing
- Adding price to the listing
- Adding details to the listing
- Adding creatives to your listing
- Adding Itinerary to the listing
- Adding new pages to your website
- Customize your menu
Add a filter option
You can include a filter option to your website which helps your visitors to filter the travel packages as per their needs. To do that, Go to Dashboard -> Scale -> Website -> Filter

Add your Travel Package Listing
You can list unlimited travel packages/tour activities on your website. Advensure didn’t set any boundaries on that.
To do that, go to Dashboard -> Serve -> Activity Listing -> Click Add Listing

On Add listing page you can add the listing details like name, location, category, no of days, Timeslots, etc.,
Based on your listing type, and you can choose your categories and all. Below video will help you to understand this step better.
Add Date To The Listing
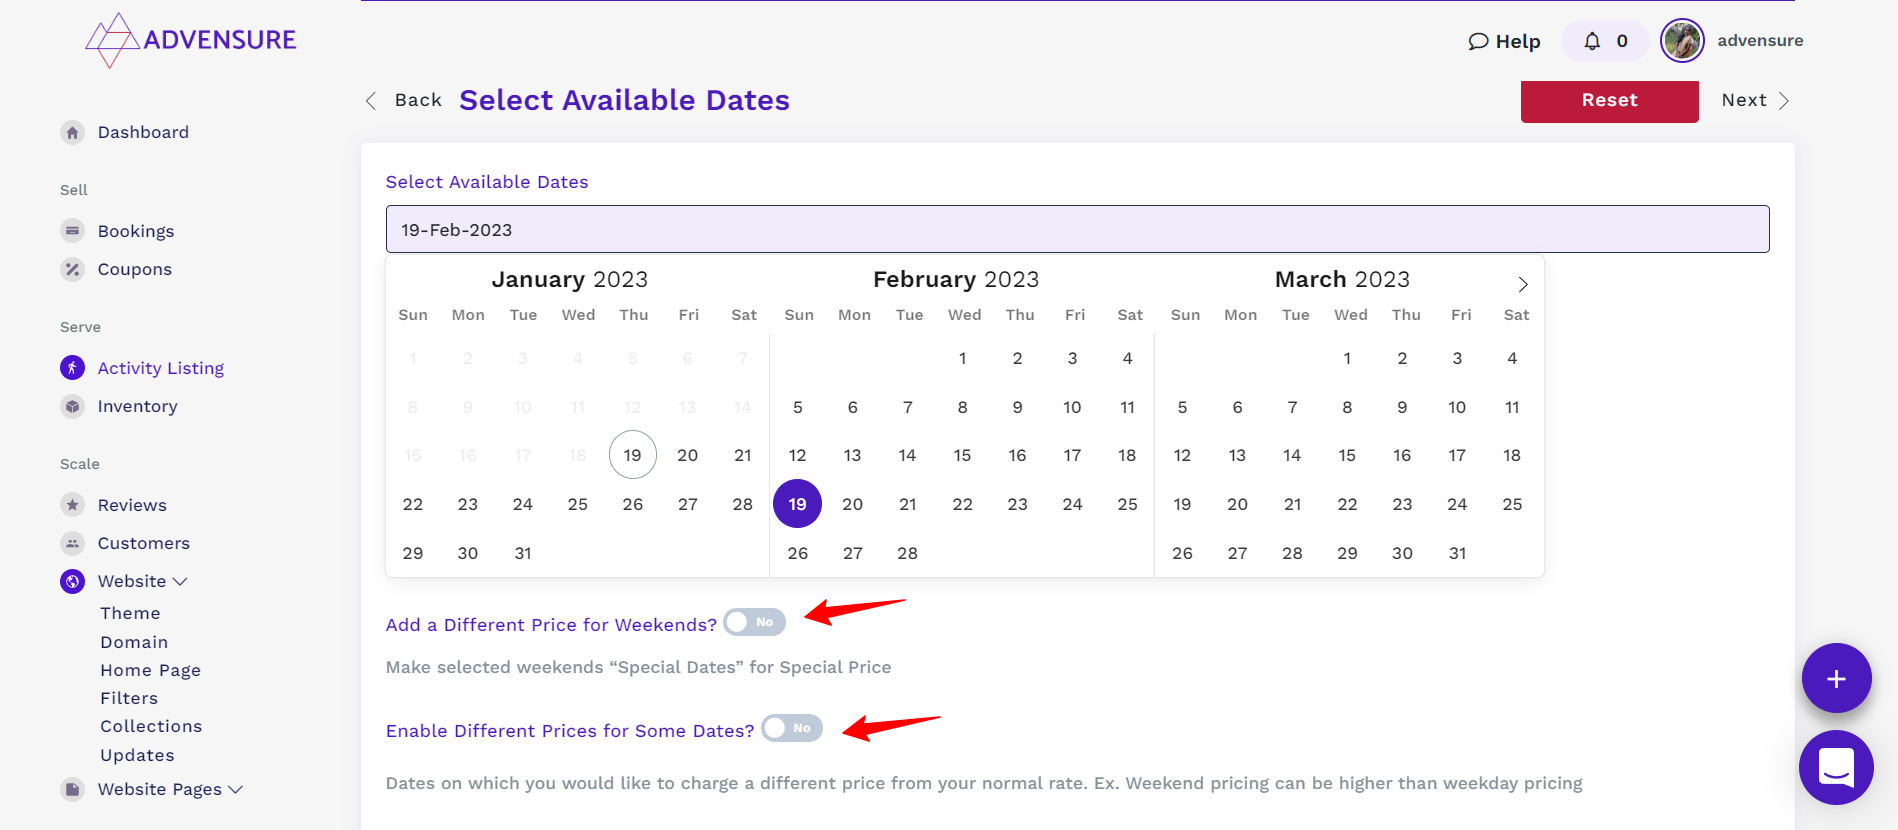
Once you are done with adding your listing, click save; it will take you to the next page where you can select the available & unavailable dates for your travel packages.

Once you click the select button from the previous step, you can also add special pricing for special dates and weekends by enabling the toggle button shown in the below image.
Add Price To The Listing
After setting up the available/unavailable date for your listing, you can now add the pricing details.
In the pricing, you can set up tax percentages, deposit percentages, refund amounts, etc.,
You can also create different pricing packages for adults, children, couples, etc., and once you are done with it, click save.
Add-Ons to Your Listing
Once you save the pricing of your listing, you will take to the next screen. Here you can include your add-on service details like the type of add-on services, including accommodation, transport, food, guide, and other ground and miscellaneous services, and pricing of the add-on, etc., the video below will explain this in detail.
Add Listing Details
After saving your add-ons to your listing, now its time to include listing details. In this step, add a description and other details like things to remember, items to carry, etc.,

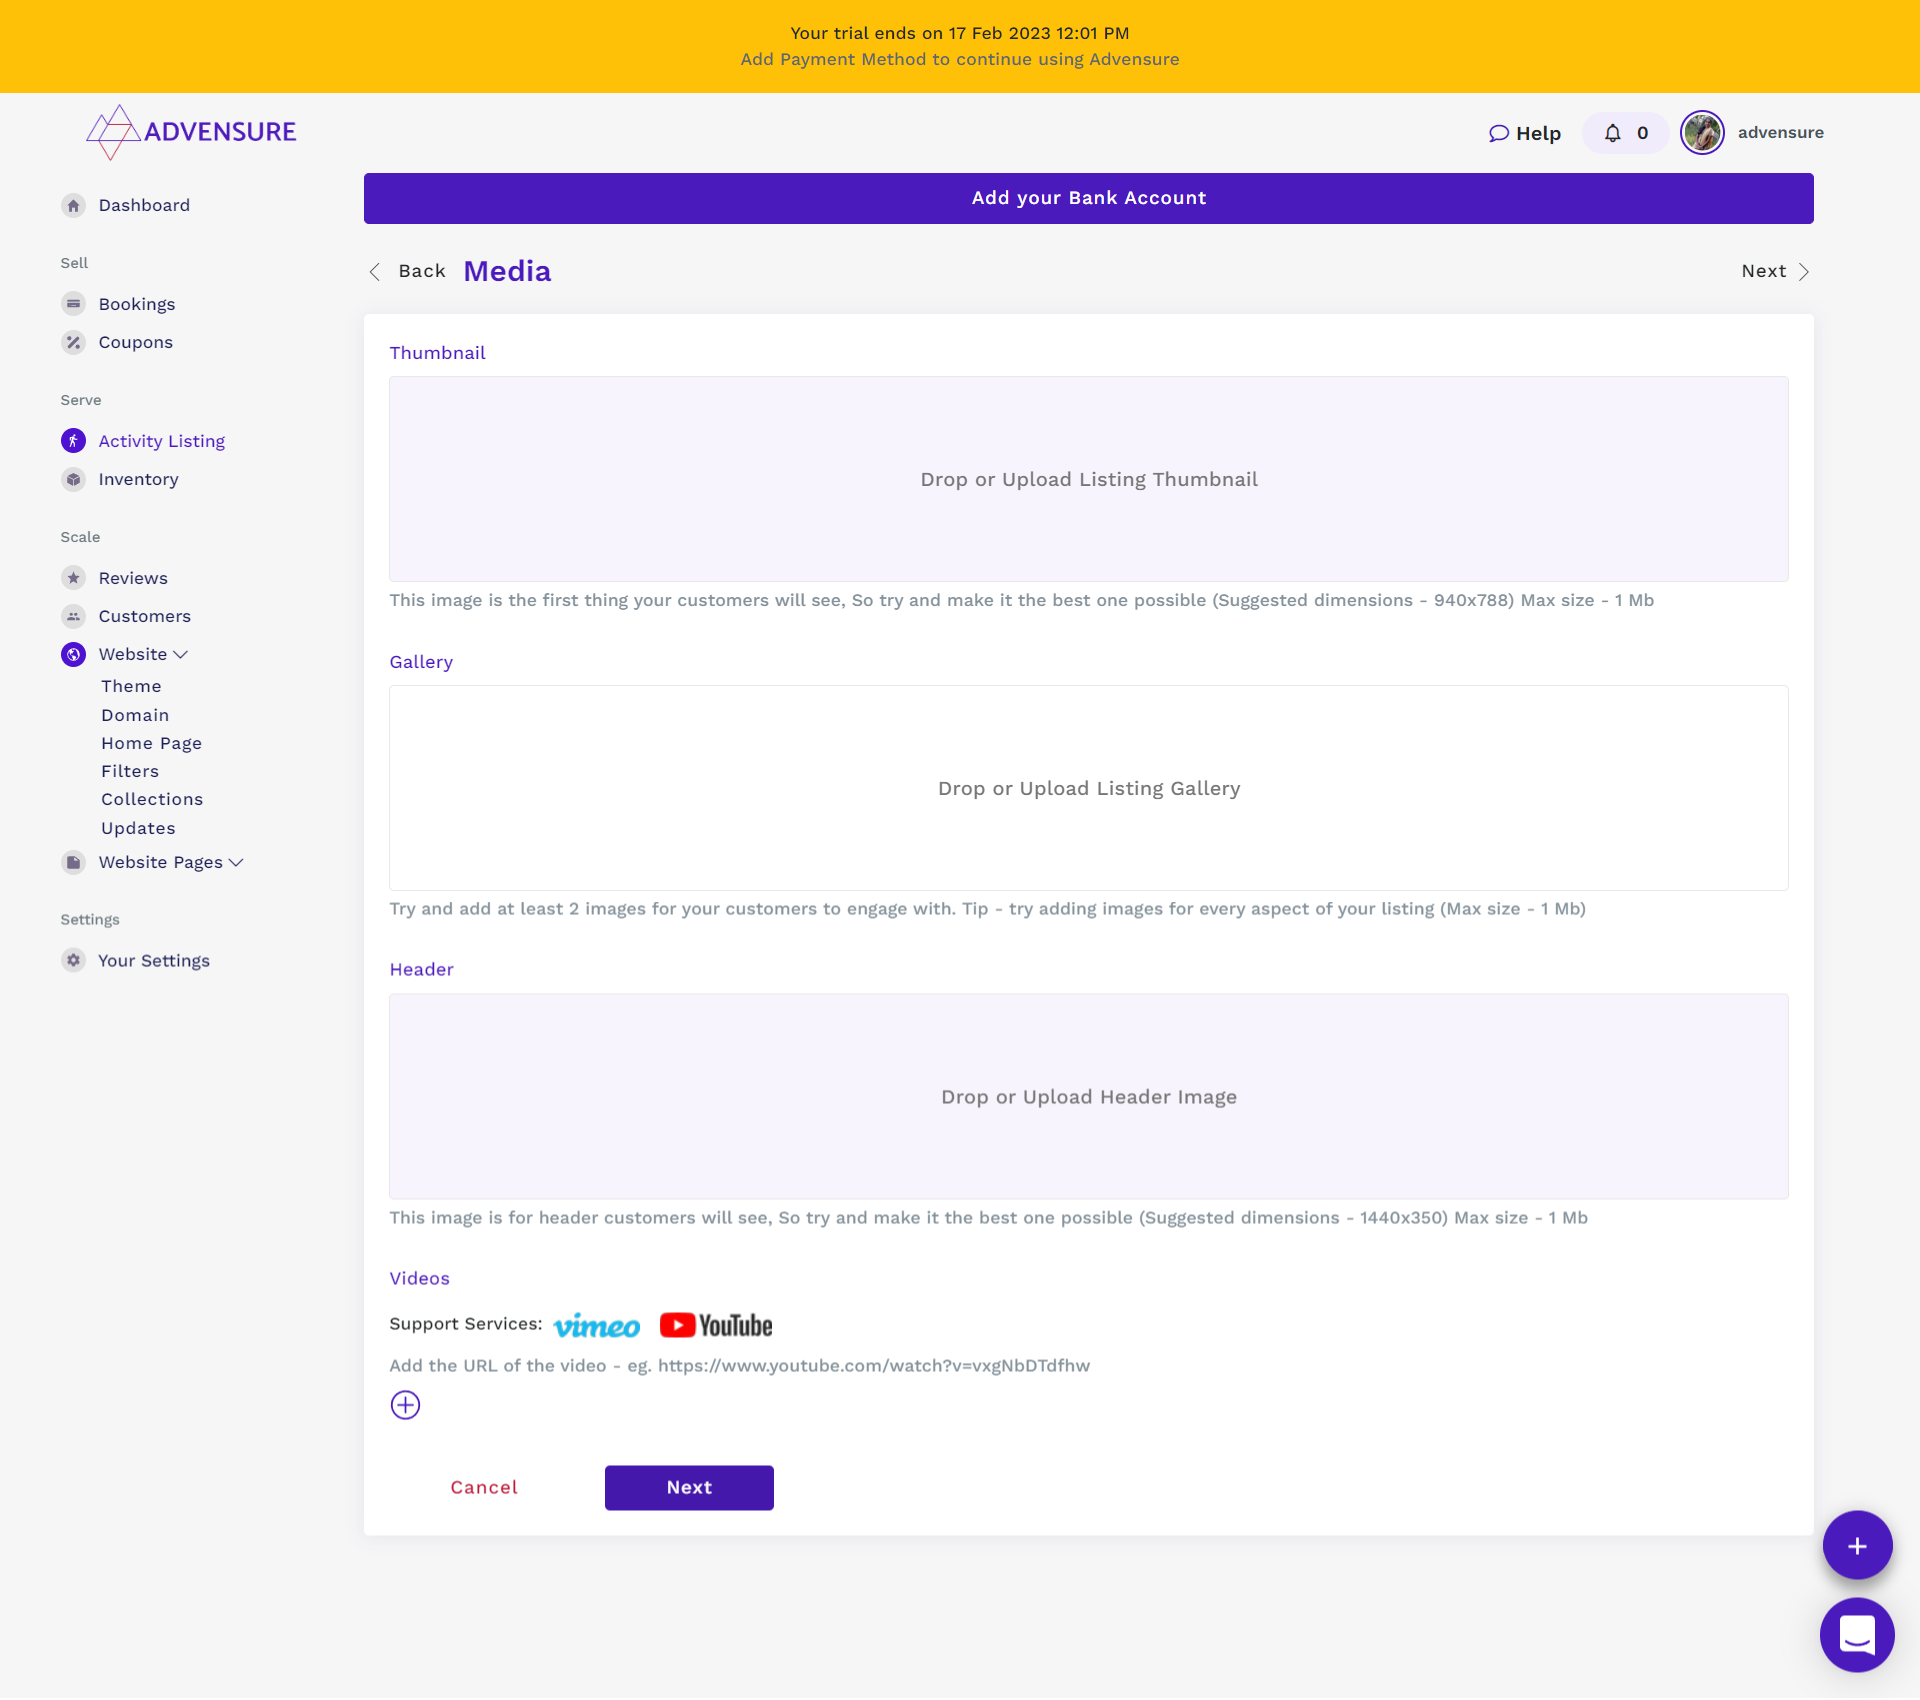
Add Media to Your Listing
After saving your listing details, the next step is to add media to the listing. Images are one of the conversion factors. Especially in the travel industry using real and high-quality images of your travel/tour activity services on your website will help your website visitors to turn into your paying customer.
Add Itinerary to Your Listing
To make beautiful memories in a given amount of time is challenging. Plan a better itinerary for your customers to ensure that each and every second of their traveling experience is memorable.

All done? Now it’s time to publish your listing on your website. You can publish your listing easily by enabling the toggle on your activity listing dashboard.

Add New Pages to Your Website
Every travel website should have the following pages to gain trust among visitors.
- About Page
- Contact Page
- Terms & Conditions
- Privacy Policy
- Cancellation & Refund Policy
To add the new page to your website, go to Dashboard -> Scale -> Website Pages -> Pages

You can easily create and publish legal pages in minutes. Go to Dashboard -> Scale -> Website Pages -> Legal Pages
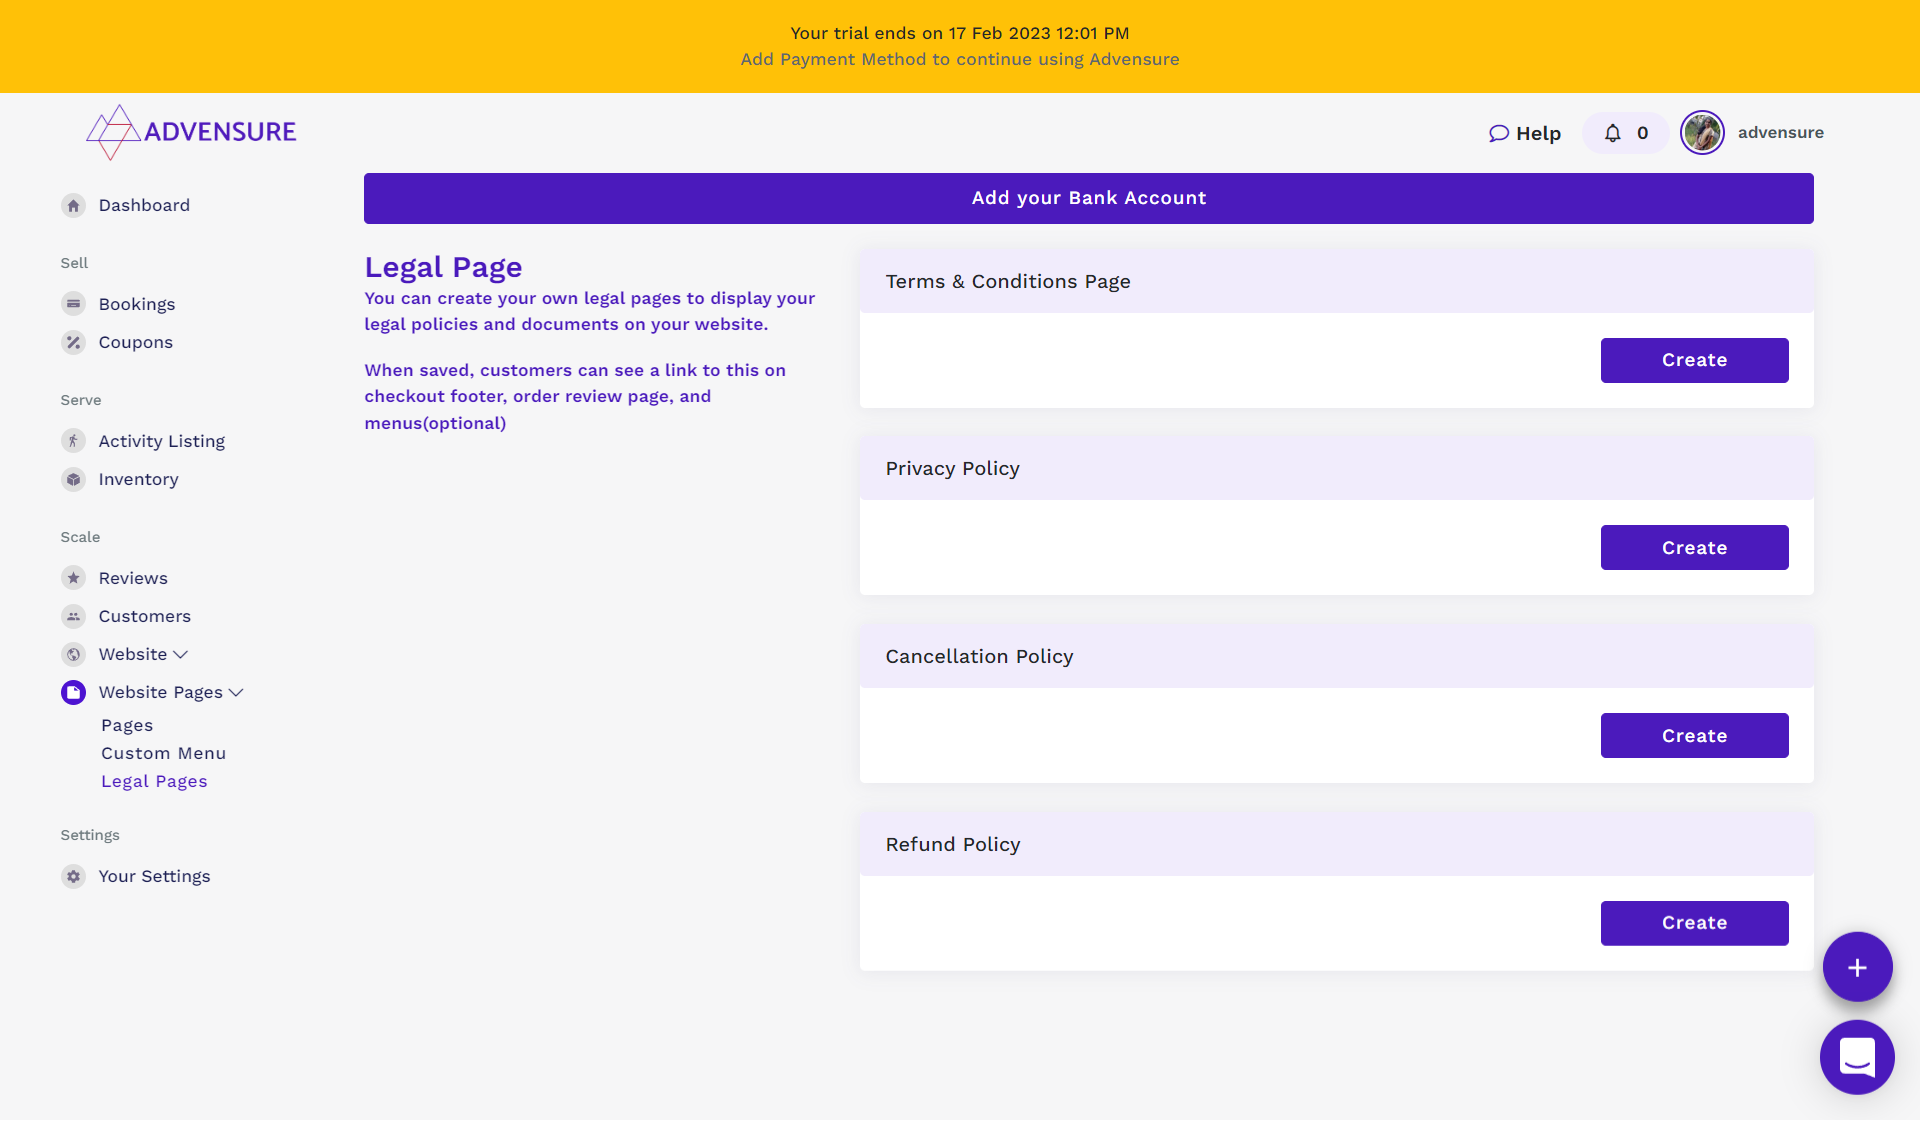
Add the details of the pages and enable the checkbox to publish your legal pages.

Step 4 – Customize your menu
You can add your pages on the header and footer menus. Also you can also include your pages in silo format. That is you can add your specific pages under the main menu as a sub-menu
You can also add your custom menu, for that Dashboard -> Scale -> Website Pages -> Custom Menu

Step 5: Subscription Box
Blogs play an important role in lead generation. To grow your email list, you need to set up a newsletter subscription option on your website. Unlike CMS, you do not need to install additional add-ons to enable this feature.
Just go to Dashboard > Scale > Website > Home Page > Subscription Text
You can add your subscription box on the footer and your listing pages as well.

You get notified whenever you get a new subscriber.
You can view and export your subscriber list from Dashboard > Scale > Customers > Subscribers.

Step 6: Optimize Your Pages For SEO
SEO plays a vital role in online marketing, and Advensure offers free SEO features to help you to optimize your page heading and description for SEO.
You don’t need additional add-ons to optimize your travel website for search engines. You can find separate fields for SEO titles and descriptions while editing your pages.
For example, if you want to add SEO for your home page, go to Dashboard > Scale > Website > Home Page.
You can find the SEO section on that page.
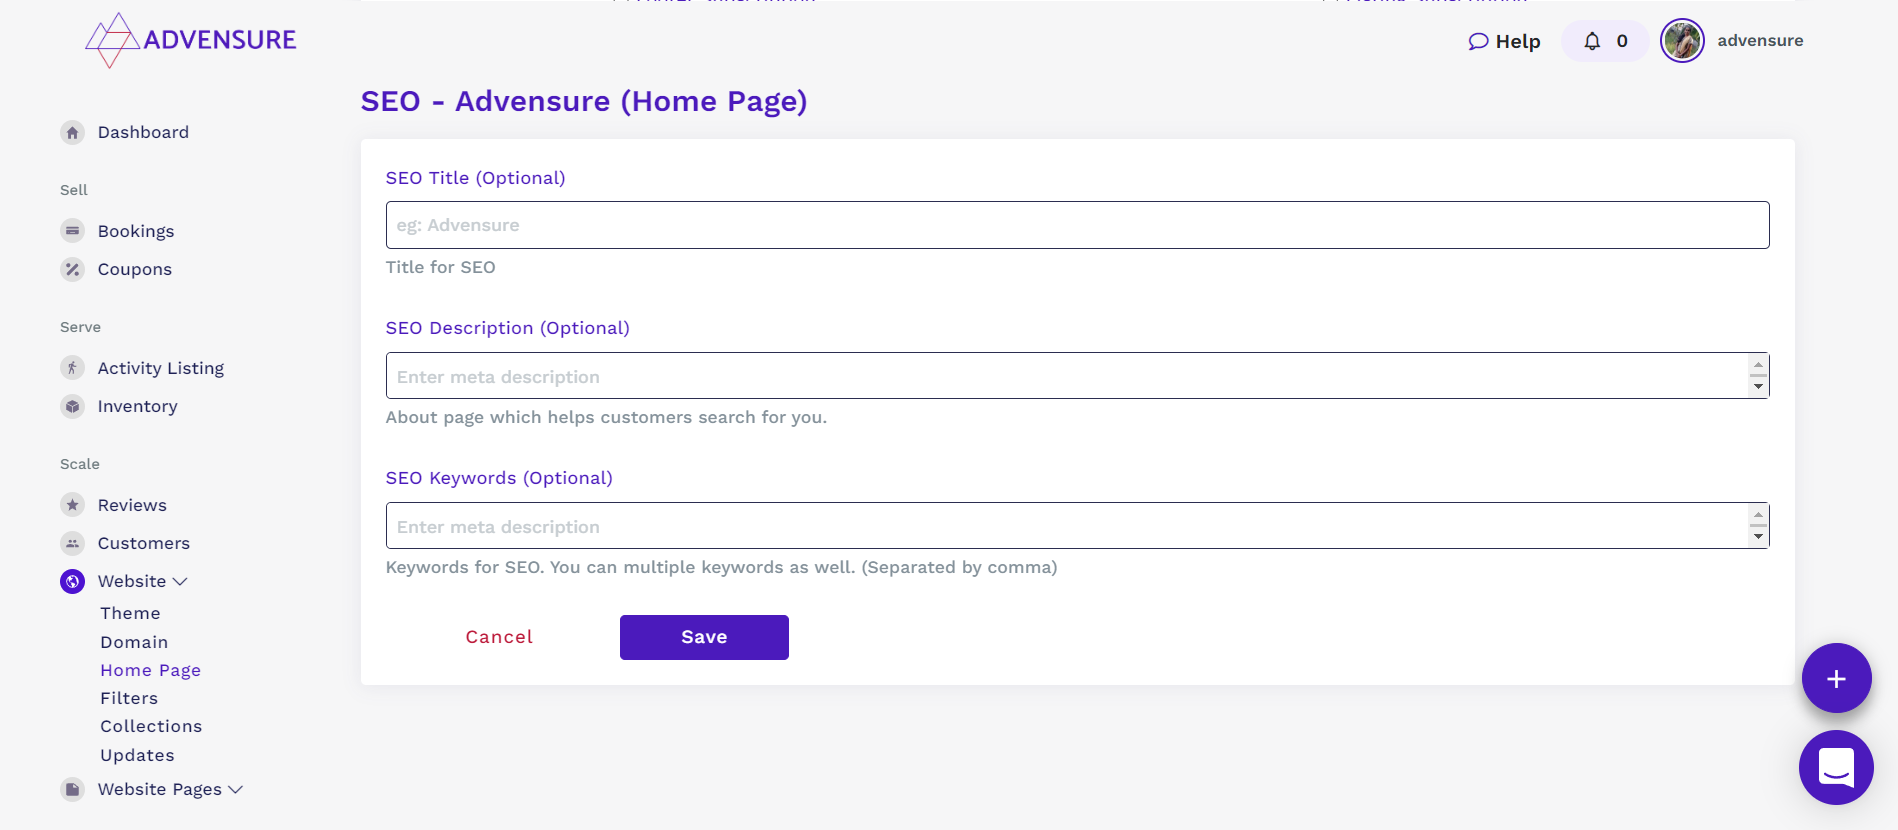
Similarly, you can optimize your other pages too. Let’s say you want to edit your activity/tour listing page; go to Activity listing > Click Edit > Go to SEO page > Add Details > Click Save
Step 7 – It’s time to sell your travel packages online
Finally, your website is ready, and now you can start selling your travel packages online and increasing your revenue.
Wrapping Up
Well, this was all about selling your travel packages online using Advensure – tour booking software.
This guide will help you to show how to sell tour packages online more effectively at a minimal cost.
Need help to grow your tour business?
Divya is a marketer, nature lover & startup enthusiast. She has an immaculate experience in GTM strategy & SEO. She always follows her instinct and travels with her Ikigai.


